
The Benefits of removing the bottom base panel of your laptop for cleaning and maintenance purposes
Removing the bottom panel of your laptop can provide several benefits for cleaning and maintenance purposes.
Improved performance:
Over time, dust and debris can accumulate inside your laptop, which can cause the internal components to overheat and slow down. Removing the bottom panel allows you to clean the internal components, including the fan, which can improve your laptop's performance.
Extended lifespan:
By cleaning the internal components of your laptop, you can help prolong its lifespan. Overheating caused by dust and debris buildup can cause damage to the internal components, which can shorten your laptop's lifespan.
Cost savings:
Regular cleaning and maintenance can help prevent costly repairs or replacements of internal components. By removing the bottom panel and cleaning the internal components, you can help prevent issues from developing, which can save you money in the long run.
Upgrades and replacements:
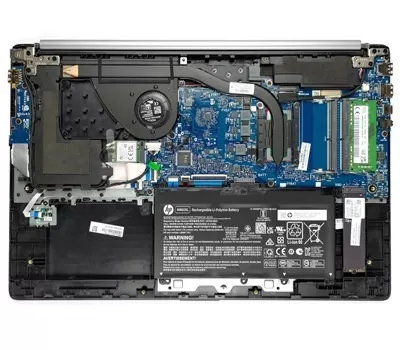
Removing the bottom panel allows you to access the internal components of your laptop, such as the hard drive, RAM, and battery. This allows you to upgrade or replace these components, which can improve your laptop's performance or extend its lifespan.
Customization:
Removing the bottom panel also allows you to customize the appearance of your laptop. You can add decals or stickers to the internal components or even modify them to suit your style.
It is important to note that removing the bottom panel of your laptop can void the warranty, so it is recommended that you check the warranty terms before attempting any repairs or upgrades yourself.
A step-by-step guide on how to safely remove the bottom panel of your laptop

Step 1:
Power off your laptop and unplug it from any power source.
Step 2:
Turn your laptop upside down on a flat, stable surface. Locate the screws on the bottom panel of your laptop. The number and location of screws may vary depending on the laptop model.
Step 3:
Using a screwdriver, carefully remove the screws. Be sure to keep the screws organized so that you know which screws belong where.
Step 4:
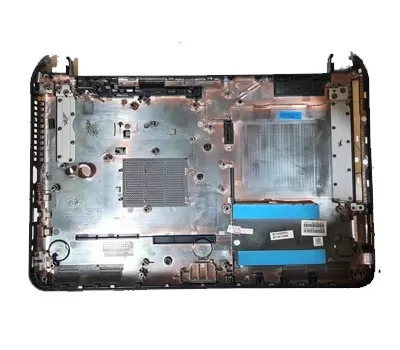
After removing all the screws, gently pry off the bottom panel. Be careful not to force the panel off or bend it.
Step 5:
Once the panel is removed, you can access the internal components of your laptop, such as the hard drive, RAM, and battery.
Step 6:
If you need to replace or upgrade any of the internal components, do so carefully, making sure not to damage any of the surrounding components.
Step 7:
When you are finished, reattach the bottom panel by carefully aligning it with the laptop and tightening the screws.
Step 8:
Power on your laptop to make sure everything is working properly.
It is important to note that removing the bottom panel of your laptop can void the warranty, so it is recommended that you check the warranty terms before attempting any repairs or upgrades yourself.
Common mistakes to avoid when removing the bottom panel of your laptop
When removing the bottom panel of your laptop, there are several common mistakes that you should avoid to prevent damage to your laptop or the internal components. Here are some of the most common mistakes to avoid:
Using the wrong tools:
Using the wrong tools can damage the screws or the bottom panel of your laptop. Make sure you have the correct screwdriver and any other necessary tools before attempting to remove the bottom panel.
Forgetting to disconnect the battery:
Before removing the bottom panel, make sure you disconnect the battery to avoid damage to the internal components. Failure to do so can cause a short circuit or damage to the battery or other components.
Applying too much force:
Applying too much force can cause damage to the bottom panel or the internal components. Use gentle pressure and avoid prying or twisting the bottom panel excessively.
Touching the internal components:
Touching the internal components with your fingers can cause ESD, which can damage the components. Wear an anti-static wrist strap and avoid touching the internal components with your fingers.
Skipping the cleaning process:
If you are removing the bottom panel for cleaning purposes, make sure you clean the internal components thoroughly. Skipping the cleaning process can cause dust and debris to accumulate, which can affect the performance of your laptop.
Not following proper procedures:
Make sure you follow the proper procedures for removing the bottom panel of your laptop. Consult the manufacturer's instructions or seek professional help if you are unsure about how to proceed.
By avoiding these common mistakes, you can safely remove the bottom panel of your laptop and perform any necessary repairs or upgrades. It is important to take the necessary precautions to prevent damage to your laptop or the internal components.
Conclusion
In conclusion, removing the bottom panel of your laptop can provide several benefits, including improved performance, extended lifespan, cost savings, upgrades and replacements, and customization. However, it is important to use the right tools and follow the correct procedures to avoid damaging your laptop or its internal components. If you are unsure about how to remove the bottom panel of your laptop, it is recommended that you seek professional help. Additionally, it is important to note that removing the bottom panel of your laptop can void the warranty, so it is recommended that you check the warranty terms before attempting any repairs or upgrades yourself.